
티스토리 뷰
지난 글까지 Spring REST Docs와 그 사용법, API 문서화를 위한 Snippet 생성을 마무리했다.
2022.09.14 - [개발/Spring] - [Spring]API Documentation - Spring REST Docs
2022.09.14 - [개발/Spring] - [Spring]Controller Slice Test에 Spring REST Docs 적용
[Spring]Controller Slice Test에 Spring REST Docs 적용
지난 글에선 Spring REST Docs와 그 기본 설정에 대해 알아보았다. 2022.09.14 - [개발/Spring] - [Spring]API Documentation - Spring REST Docs [Spring]API Documentation - Spring REST Docs 지난 글까지 단위..
gnidinger.tistory.com

이번 글에선 그 마지막 작업인 API 문서화와 HTML 파일 생성을 진행해 본다.
Create a Template
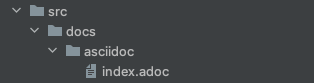
저번 글에서 말한대로 src/docs/asciidoc 폴더 아래에 index.adoc 템플릿 문서를 생성한다.
계속해서 API 문서 작성을 위한 템플릿을 완성하자.
= 커피 주문 애플리케이션 // 문서 제목
:sectnums: // 문서의 목차와 관련된 항목
:toc: left
:toclevels: 4
:toc-title: Table of Contents
:source-highlighter: prettify

Gni <gni@gmail.com> // 생성자 정보

v1.0.0, 2022.09.14 // 생성 날짜

// 테스트 케이스로 만들어낸 Snippet 사용
// 'include::{snippets}/Snippet이 위치한 폴더/Snippet문서 이름.adoc'
== MemberController
=== 회원 등록
.curl-request
include::{snippets}/post-member/curl-request.adoc[]

.http-request
include::{snippets}/post-member/http-request.adoc[]

.request-fields
include::{snippets}/post-member/request-fields.adoc[]

.http-response
include::{snippets}/post-member/http-response.adoc[]

.response-fields
include::{snippets}/post-member/response-fields.adoc[]

=== 회원 정보 수정
.curl-request
include::{snippets}/patch-member/curl-request.adoc[]

.http-request
include::{snippets}/patch-member/http-request.adoc[]

.request-fields
include::{snippets}/patch-member/request-fields.adoc[]

.http-response
include::{snippets}/patch-member/http-response.adoc[]

.response-fields
include::{snippets}/patch-member/response-fields.adoc[]
위 코드는 Asciidoc 문법으로 작성된 템플릿이다.
문서 제목과 목차를 잡고, 생성 날짜까지 추가한 뒤에
지난 글에서 생성한 Snippet을 제자리에 끼워 넣어준다.
템플릿에 Snippet을 끼워 넣는 방법은 위에 적힌 대로 정해져 있다.
include::{snippets}/Snippet이 위치한 폴더/Snippet문서 이름.adoc[]
Create a HTML Document
이어서 Gradle의 :build 또는 :bootJar task를 실행하면 index.adoc → index.html 변환이 진행된다.

Gradle의 Task 위치이다.

Task 실행 후 HTML 파일이 생성된 것을 확인할 수 있다.
이제 앱을 실행하고 HTML 파일 경로에 접속해보자.

위와 같은 화면을 만났다면 성공이다.
'Java+Spring > Spring' 카테고리의 다른 글
| [Spring]프로젝트 빌드 & 실행 (2) | 2022.09.16 |
|---|---|
| [Spring]zsh: permission denied: ./gradlew (0) | 2022.09.16 |
| [Spring]AsciiDoc, Asciidoctor (0) | 2022.09.15 |
| [Spring]Controller Slice Test에 Spring REST Docs 적용 (2) | 2022.09.14 |
| [Spring]API Documentation - Spring REST Docs (6) | 2022.09.14 |
| [Spring]테스트 주도 개발(Test Driven Development, TDD) (6) | 2022.09.13 |
- Total
- Today
- Yesterday
- 스트림
- 여행
- Algorithm
- 기술면접
- 칼이사
- 유럽
- 리스트
- spring
- RX100M5
- a6000
- 파이썬
- 세계여행
- 자바
- 면접 준비
- 세모
- Backjoon
- BOJ
- 맛집
- 세계일주
- java
- Python
- 백준
- 지지
- 야경
- 동적계획법
- 중남미
- 남미
- 유럽여행
- 스프링
- 알고리즘
| 일 | 월 | 화 | 수 | 목 | 금 | 토 |
|---|---|---|---|---|---|---|
| 1 | 2 | 3 | 4 | |||
| 5 | 6 | 7 | 8 | 9 | 10 | 11 |
| 12 | 13 | 14 | 15 | 16 | 17 | 18 |
| 19 | 20 | 21 | 22 | 23 | 24 | 25 |
| 26 | 27 | 28 | 29 | 30 | 31 |